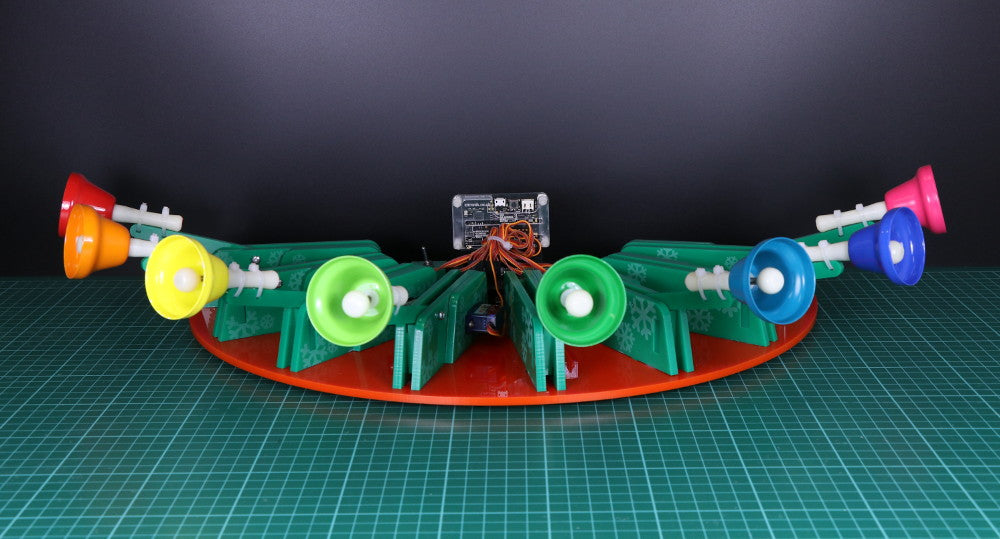
For day twelve of our 12 Makes of Christmas we made Servo & microbit controlled Christmas Bells. Follow our step by step guide and build your own out of laser cut parts.

We’ve included all of the DXF files so that you can cut all of the parts you will need but you will have to source the bells separately. We got ours from Amazon, you will find the link below.
You Will Need:
- 1 x Set of Mini Rainbow Music Bells (8 Bells).
- 1 x BBC micro:bit.
- 1 x Kitronik I2C Servo Driver Board for the BBC micro:bit.
- 1 x 5mm Perspex Sheet for Base.
- 1 x 5mm Perspex Sheet for Bell & Servo Mounts.
- 8 x 180 degree mini servos.
- 1 x SPST Toggle Switch.
Downloads:
- DXF Cutting files, download them here.
- Pre coded Christmas music HEX files, download them here.
Servo & microbit Controlled Christmas Bells:
Step 1:

Cut out all of the pieces from 5mm thick Perspex.
Use two M3x8mm countersunk screws to attach the battery pack to the base plate. These should thread straight into the Perspex.

Insert 3 AA batteries.
Step 2:

To attach the I²C board to the base plate, use four M3x25mm screws and four 20mm plastic spacers. Thread the screws through the board and spacers and into the base plate, so that the board is directly over the batteries.

Alternatively, you could screw in from the top and bottom using shorter screws however you would need to add some rubber feet to allow the base plate to sit flat.

Step 3:

Add an ON/OFF switch to the circuit. Check that it is the right way round by attaching a servo and adding some code before soldering. I used an SPST toggle switch.

Step 4:

Glue the switch box together as shown and insert the switch. Fix in place with a nut.

Fix to the base plate with some more glue, ensuring the wires are neatly tucked away.

Step 5:

Fix a 180° servo to the small piece pictured using the two mounting screws.

Once screwed firmly into place the servo should tightly held, with no give in any direction.

Step 6:

Push the larger piece with the circular hole over the servo and fit the single control horn in place as shown, with the servo rotated fully clockwise.

Fix in place with the small screw provided with the servo.

Step 7:

Repeat steps 5 and 6 until you have 8 copies.
Step 8:

Join the bells to the laser cut arms using two small cable ties.

Cut off the excess cable.

Step 9:

Repeat step 8 for all of the bells.
Step 10:

Take one of the servo holding assemblies from steps 6 & 7 and slot in two spacer pieces. Roll the servo anticlockwise so that it is in the fully upright position.

Insert an M3x16mm screw through the hole as shown and fit the bell arm with a spacer on either side. Make sure the bell is located on top of the arm.

Slot the last panel onto the assembly and screw in place. The screw passing through the bell arm should thread into the panel and hold the pieces together as shown.

Step 11:

Repeat step 10 with the rest of the pieces and components. You should have 8 assemblies ready to fit onto the base panel.
Step 12:

Fit and glue the bell assemblies into place, going from the highest to the lowest note clockwise. For the bells we used, 8 was high and 1 was low.

Once they are all glued in place, plug the servos into the I²C board, starting with the far right bell in servo slot 1. Fit the rest chronologically 2 through 8.

Neaten up the loose servo wires with a cable tie.
Step 13:
Get coding and add more songs or use the code provided to play some Christmas tunes!
- Precoded Christmas music HEX files, download them here.
This concludes our 12 Makes of Christmas series of resources. We hope you’ve enjoyed them as we enjoyed making them and building our advent calendar. You can check out all of the 12 Makes of Christmas, here.