This fun learning resource has been put together to provide teachers with an all in one design and technology challenge that you can set for your students over the course of a term or a year. The resource includes a number of different design and technology aspects; electronics, mechanical assembly, 2D and 3D design, using a laser cutter, using a 3D printer and coding and testing. If your school doesn’t have access to a laser cutter or 3D printer there are alternative methods highlighted in the individual resources.  We also intend to produce a series of games and challenges that can be played with the buggies once they are complete. The games will be explained in full and will also include full sets of rules and also a scoring guide. These games will offer a fun way for the students to test their designs in a competitive way. Watch this space..!
  The added bonus is that this resource is also a great way for anyone with a Kitronik Line Following Buggy to get more out of their project, after all there are only so many lines that you can follow before you need another activity! You can even bypass the design aspect of this resource and jump straight to Martin Woolley’s excellent coding and Bluetooth articles and turn your buggy into a remote controlled buggy. We have also included download links for all of our design files for those that want to go straight to producing the finished item. You will find these links in the relevant resources.
How Did The Robot Buggies Come To Be:
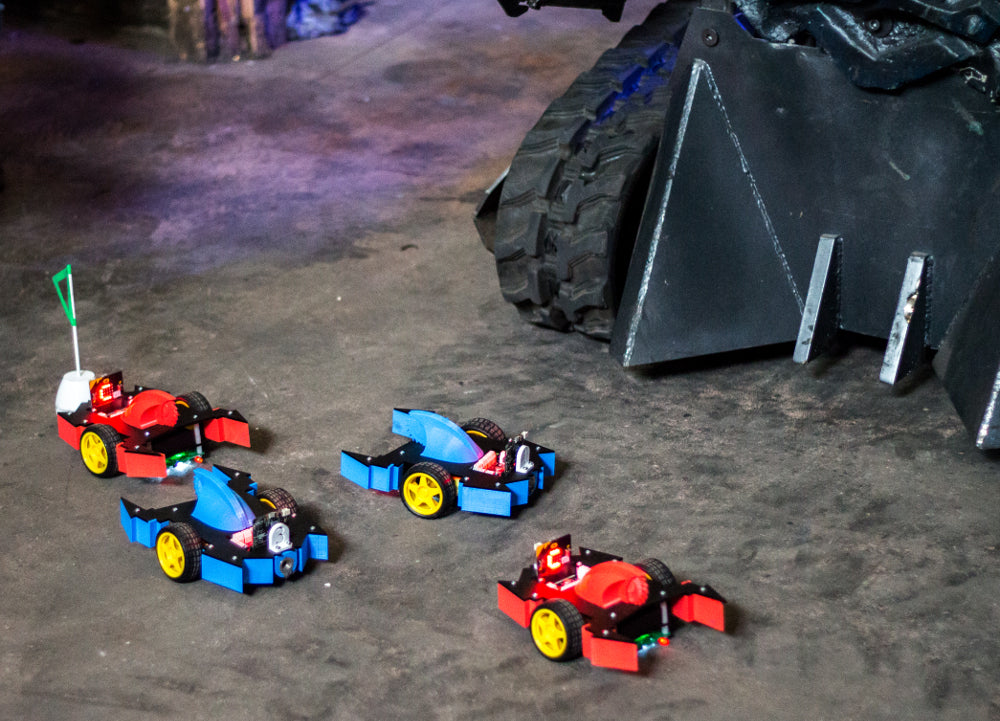
We were approached by the BBC to come up with some buggy designs inspired by Robot Wars. The buggies, unlike their larger Robot Wars counterparts, were to compete in non lethal competitions, such as football and capture the flag, which we did with Sir Killalot watching over proceedings. The buggies would need to be modified so that they were fit for playing the games, were aesthetically pleasing and be able to be controlled remotely. To be honest, they had us at Robot Wars. Challenge accepted!  The time scales were very tight but luckily we have a skilled product designer on hand and direct access to Martin Woolley’s Bluetooth expertise, so between us we’d got one dreamt up, designed, built and tested (played with) within a few days.
What Were The Robot Buggy Design Challenges:
- Everything had to fit directly to our line following buggy.
- The finished buggies needed to have a Robot Wars theme.
- We needed to design two teams of buggies.
- When assembled the buggies needed to be robust enough to withstand regular impacts.
- The designs needed to be easy to produce and simple to assemble.
- We wanted it to be modular, ie made of parts fitted together so that design changes and/or personalising them was as easy as possible.
- We needed to make the buggies capable of herding a football.
- We needed to design a self righting flag and come up with a way for the buggies to grab it.
- At the time we used a mobile phone via Bluetooth, but control can easily be via a second micro:bit.
- We had a very tight timescale.

The Things You Will Need:
- 1 x Line Following Buggy for the BBC micro:bit.
- 1 x BBC micro:bit.
- 1 x 2D CAD program such as Autocad.
- 1 x 3D CAD program such as Autodesk Fusion 360.
- 1 x Laser cutter.
- 1 x 3D Printer.
- 1 x 3mm Midnight Black Perspex Sheet (Frosted) or alternative.
- 1 x 3D printer filament. (qty dependent on number of buggies)
- 1 x An Android Device, phone or tablet.
- 12 x M/F Spacers.
- 12 x 6mm M3 Screws.
- 2 x 10mm M3 screws.
NB: If not using a laser cutter or 3D printer the items in bold above can be discarded. Designs can be drawn on paper and used as a stencil. The Perspex can be cut by hand and then drilled, the 3D add-ons can also be made from Styrofoam craft foam or a similar product. 
| Build A Robot Wars Buggy Learning Resources. | |
|---|---|
| Part 1 – Intro. | What we did, why we did it and what we used. |
| Part 2 – The Buggy. | It’s all about the line following buggy, We used the buggy as is and attached custom parts. |
| Part 3 – The Perspex Top Plate. | How we designed and cut the top plate, with alternative methods for those without laser cutters. |
| Part 4 – The 3D printed Add-ons. | How we designed and 3D printed the add-ons, with alternative methods for those without 3D printers. |
| Part 5 – Making The Flag. | Our design process for making the self righting flag. |
| Part 6 – Coding with the Microsoft MakeCode Editor. | Beyond line following. Martin Woolley gives a very thorough breakdown of how he wrote the code for the Robot Buggies. Learn how! |
| Part 7 – Bluetooth Buggy Control. | How to turn your Android device into a remote control for the buggy, including pairing instructions, Again, over to Martin Wooley. |