Adding ZIP Hex LEDs to our Simple Robotics Kit is a great and easy way of adding indicator lights to your robot buggy. It’s super simple, fun, and we’ve also included some code so you can get straight to play!

Our Simple Robotics microbit buggy Kit features a, no solder required, clip together design. This opens up entry-level robotics to the younger children. In this quick tutorial, we show you that the cardboard chassis is not the only customisation option.
You Will need:
- A micro:bit.
- 2 x ZIP Hex LEDs.
- Simple Robotics Kit.
- 6 x Crocodile clip leads (there are enough in the kit to do this).
Adding ZIP Hex LEDs To The Simple Robotics Buggy Kit:
The Klip Motor Driver for the BBC micro:bit does much more than just drive motors. It also breaks out the main pads on the BBC micro:bit itself, and there’s also a ZIP LED output as well. The ZIP LED outputs are how we will connect our indicator lights to the micro:bit.

Connecting the ZIP Hex LEDs:
Because of the ‘clipable’ design of the motor driver board and also the way that ZIP LEDs can be chained together make this is very simple to connect up.
Firstly, we need to connect three crocodile clip leads to the Klip Motor Driver board.

Then, we need to connect the other ends of the leads to our first ZIP Hex LED.

As you can see from the image above, we have used three of the available 6 connections. Ensure that when connecting this ZIP LED that you connect to the ‘IN‘ side and not the ‘OUT‘ side.
Now, we connect to the second ZIP Hex LED using the remaining ‘OUT‘ side connections.

Then we connect the other end of the three wires to our second ZIP Hex LEDs ‘IN‘ side connections.

Connections done! All that remains is to arrange the wires tidily in your buggy!

Thread the lights and wires through the chassis side pieces until you have the lights arranged to your satisfaction.
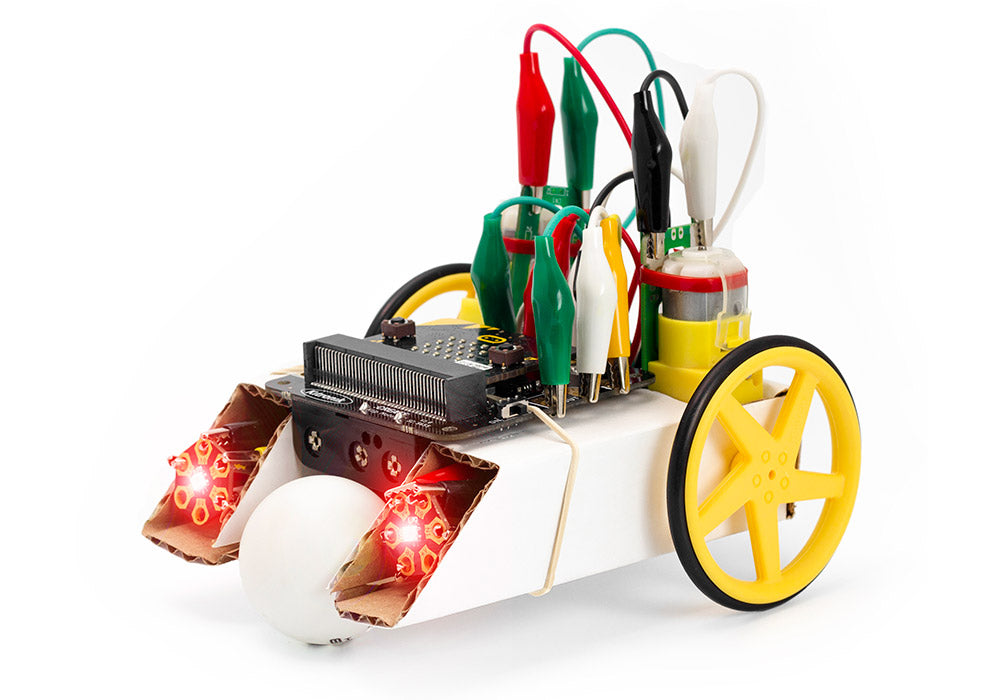
Once finished, you should now have something that looks like ours, shown below.

Coding:
Create the following code or download it and drop it straight onto the micro:bit.
- When button A is pressed, the buggy travels forward with white indicator lights. It then turns with an orange indicator, followed by reversing with red LEDs.
- Button B will cause the LEDs to flash a pattern.
This code should be easy to adapt and use in any buggy project.
The code uses the custom Kitronik MakeCode package which makes programming the buggy and controlling the LEDs simple.
To add them to the editor, select the cog icon in the top right of the editor. Then, select Extensions from the drop-down menu and in the search bar type and enter Kitronik. Pick the tile from the list and the new blocks will be added to the menu in the editor.