In this tutorial you will find Experiment 11 Making a Pedestrian Crossing for the Kitronik Inventors Kit for the BBC microbit . This is an additional experiment to the ten that were included with the Inventors Kit, and has been created for you to get more from your kit. You will learn how to build the circuit and how to code the BBC microbit to control the circuit.

You can complete this experiment with or without the Inventors Kit. If you do not have the Kitronik Inventors Kit you will have to source all of the required components separately, a full list of the things you will need can be found below. We also advise the use of a breadboard as trying to complete this experiment with crocodile leads would be more than a little challenging.
This Experiment Requires:
- 1 x BBC micro:bit.
- 2 x Red 5mm LED.
- 1 x Orange 5mm LED.
- 2 x Green 5mm LED.
- 5 x 47Ω Resistors.
- 1 x Piezo Element Buzzer.
- 7 x M/F Jumper Wires.
The Aims Of This Experiment Are:
- To use six output pins to drive five LEDs and a buzzer.
- Using the ‘repeat’ loop.
- And to use the ‘play tone’ block.
- To learn how to setup initial LED states(outside of the main function loop).
Experiment 11 Video Walk Through:

Experiment 11 Making a Pedestrian Crossing:
Using Block commands it is possible to control up to six outputs. This experiment will use all six to create a traffic light and pedestrian crossing demonstration. Five of the outputs will be used to drive LEDs, three of which will be used for the traffic light and two will be used for the stop and go indicators on the pedestrian crossing. The remaining output will be used to drive the piezo buzzer. This will all be controlled by a relatively simple sequence of Block commands.
The Microsoft MakeCode Editor For The BBC micro:bit:
This experiment is created using the Microsoft MakeCode Editor. The Microsoft MakeCode Editor is a drag and drop visual editor that provides a simple introduction to programming. Blocks snap together to build programs and are grouped by the type of function they do. When a group is selected the commands in that group are shown and can be selected.
Create The Following Code:
If you’re having difficulty producing your own code for this experiment, we’ve created the code for you that you can download directly from the embedded editor above.
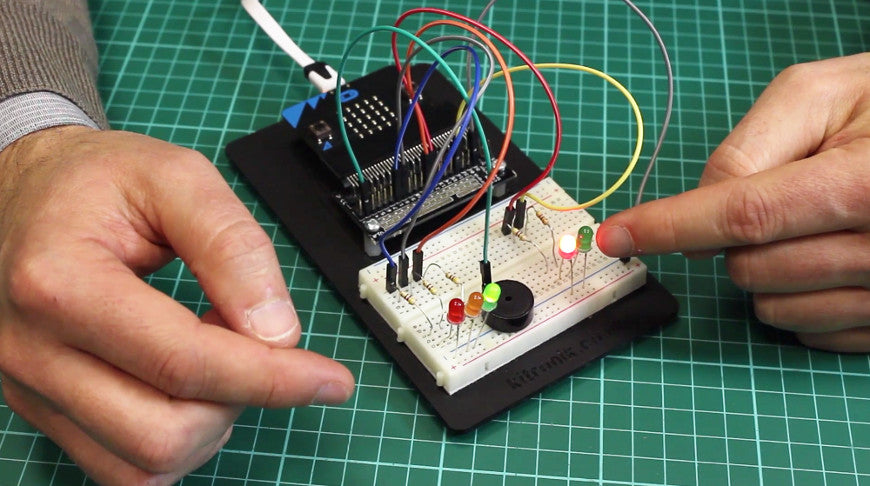
Building This Circuit On The Prototyping System:
It is possible to build this circuit using the Prototyping System for the BBC micro:bit and the components listed at the top of the page. Once you have sourced the required parts you can follow the diagram below.

What Will Happen?:
First of all the traffic light LEDs default to ‘green’ and the pedestrian crossing LEDs default to ‘red’. When button A is pressed on the BBC microbit the traffic light LEDs go from ‘green’ to ‘amber’ to ‘red’. The pedestrian LEDs then change from ‘red’ to ‘green’ indicating that it is safe to cross, during which the buzzer beeps. After eight beeps the pedestrian LEDs change back to ‘red’ and the traffic lights go through the ‘red’ to ‘red + amber’ to ‘green’ sequence. This is now back at the original starting state.
Circuit Diagram:

What’s Going On?:
The set ‘digital write 1 to pin P12’ and ‘digital write 1 to pin P2’ are used to set the initial LED states, which turn on the ‘green’ traffic light LED and the ‘red’ pedestrian crossing LED. These Blocks just execute once when the BBC micro:bit is turned on. The code then waits for button A to be pressed on the BBC micro:bit before executing the main loop of code. When button A is pressed the Blocks before the ‘repeat’ loop execute causing the traffic light LEDs go from ‘green’ to ‘amber’ to ‘red’. The pedestrian LEDs then change from ‘red’ to ‘green’ indicating that it is safe for the pedestrian to cross. The ‘pause’ blocks give the delays between each step of the sequence. The LEDs are connected as follows:
| TRAFFIC LIGHTS. | PEDESTRIAN CROSSING. | BBC micro:bit PINS. |
|---|---|---|
| Red | P1 | |
| Amber | P8 | |
| Green | P12 | |
| Red | P2 | |
| Green | P16 |
When it is safe to cross and the ‘green’ pedestrian crossing LED is lit up and the buzzer then beeps eight times. This is controlled by the ‘repeat’ loop. In each loop a tone is played and then there is a pause after each tone. After the beeps the next set of Blocks execute which change the pedestrian LEDs back to ‘red’ and causes the traffic lights go through the ‘red’ to ‘red + amber’ to ‘green’ sequence. This is now back at the original starting state and the code awaits another press of button A.
Code Downloads:
The code examples below have been individually zipped and can be downloaded by clicking on your preferred option. Once unzipped you can either open the and edit the code in appropriate editor or place the HEX file onto your microbit*.
MakeCode Editor & Python Code Downloads:
- This code was created with the MakeCode Editor, get the HEX file here.
- This code was created in MicroPython, get the code here.
Legacy Editors Code Downloads:
NOTE: The legacy editors will disappear at some undisclosed point in the future. The code can still be placed on a microbit and will run regardless but you won’t be able to use an editor. When that happens, switch to using one of the currently supported editors. We’ve already made the switch as the new editors are better and more fully-featured.
- This code was created with the Blocks Editor, download the HEX file here.
- And this code was created with the Touch Develop Editor, download the HEX file here.
* – To place the unzipped HEX file onto your microbit, connect your microbit to your computer via USB and then open File Explorer (Windows). Your microbit should show up as a removable drive. Simply drag and drop your HEX file onto the microbit in file explorer and the file will be transferred. The power light on the back of the microbit will start to flash, once the flashing stops the microbit is ready to run your code.
Extension Tasks:
- Can you alter the tone of the beeps and how many times they are repeated?
- Try adding an image on the BBC micro:bit display when it is safe to cross the pedestrian crossing.
Thank You!:
This experiment was inspired by work produced by Thomas Stratford who is an ICT Technician for the Misbourne School. When he isn’t fixing IT problems, he spends his time making, tinkering and building Electronics projects. He is currently learning about the recently released BBC micro:bit. For up to the minute accounts of Thomas’ projects, follow him on Twitter: @MrTomsWorld Tom created his code using Touch Develop and more details can be found at: https://kitronik.co.uk/blogs/resources/bbc-microbit-pedestrian-crossing-project
Kitronik Inventors Kit Resources:
| Exp No#. | Experiment Name. | Resource Type. |
|---|---|---|
| 1 | Say Hello to the BBC micro:bit. | Further Help. |
| 2 Pre V1.7 | Using an LDR and analog inputs. | Full Experiment + Further Help. |
| 2 V1.7 | Using a Light Sensor & analog inputs. | Full Experiment + Further Help. |
| 3 | Dimming an LED using a potentiometer. | Further Help. |
| 4 | Using a transistor to drive a motor. | Full Experiment + Further Help. |
| 5 | Using the accelerometer to control motor speed. | Further Help. |
| 6 | Setting the tone with a piezo buzzer. | Further Help. |
| 7 | Wind Power. | Full Experiment + Further Help. |
| 8 | Making a game using the compass. | Further Help. |
| 9 | Capacitor charge circuit. | Further Help. |
| 10 | Using an RGB LED. | Further Help. |
| 11 | Making a pedestrian crossing. | Full Experiment + Further Help. |
| 12 | Making a random dice. | Full Experiment + Further Help. |