
Exploring interesting concepts from various areas of design and technology is one of the best things about making new projects. Today, Emma pulls inspiration from Victorian theatres and Theme Park dark rides to make a tiny demonstration of the Pepper’s Ghost effect!
What is Pepper’s Ghost?

The Pepper’s Ghost effect is an optical illusion, named for its creator John Henry Pepper who began exhibiting the effect with a theatre demonstration in 1862.
Pepper’s Ghost is an effect used to create ghostly images by using an angled piece of reflective transparent material (like, glass, acrylic or PETG) to reflect an image into the scene. We have put together a make that demonstrates the effect in a simple box, using our brand new Black MDF to create a dark environment to intensify the effect. The final make will reflect an image from your smartphone and make it appear to be interacting with a still image placed in the back of the box.

You Will Need:
- This DXF
- Black MDF
- PETG
- Any 3mm Material for the drawer - we used Silver Glitter Acrylic
- Potentially some PVA to hold together any loose finger joints on the MDF.
- Acrylic Glue - We used Bostik Hard Plastics.
Step 1 - Getting the materials together:

Open our DXF. We have provided a labelled diagram above. The box itself is designed for 6mm thick material to accommodate our new Black MDF and the drawer for 3mm material to accommodate our Silver Glitter Acrylic. You can change the materials used to your own tastes.
Step 2 - To the laser cutter:

Cut these out on your Laser Cutter - be careful to clean the pieces so that no dust or smears get on the PETG later. This may make the illusion less effective.
Step 3 - Making the drawer:

Start Assembling! Simply slot the drawer together using a little acrylic glue on the finger joints, and stick the handle on in the same way. A hole has been made in the handle spacer and the drawer front to make alignment easier and also to allow for an optional screw.
Step 4 - Assemble the box:

Now put the box together in the same way using the finger joints and a little PVA if the fit is looser. Make sure you assemble the sides around the drawer separator first, else you won’t be able to fit it in later.
Step 5 - Place PETG mounting points:

Use small offcuts of Black MDF to form wedges at the back of the drawer separator and the front of the top of the box to help with fitting your PETG later. These will require gluing.
Step 6 - Printing the background image:
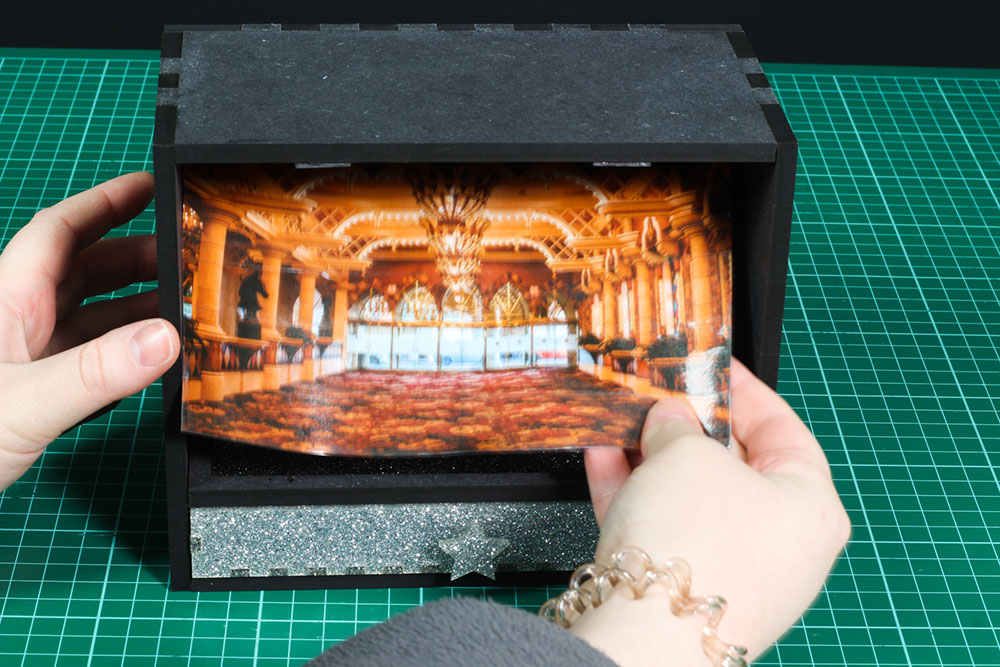
Print a picture you want to use for the back of your Pepper’s Ghost box. We’ve used a hotel lobby found on Unsplash Here (https://unsplash.com/photos/XYuNwlYtfLI) but you can use whatever you like! Unsplash is a great source for high quality free use images.
Step 7 - The PETG:

Now measure and cut some PETG using scissors - any thickness you have to hand is okay. We made sure to initially cut a general size a little bigger than we thought we needed and then trimmed down until we had a rectangle of PETG that would friction fit into the space.
Step 8 - Video, or it won't happen:
Find a video of a Pepper’s Ghost effect on Youtube on your smartphone, pop your smartphone into the drawer, with the video playing facing the back of the box. We’ve used the above video. Then sit back and watch the magic!
One of the best sources of new Kitronik information is our Newsletter. To make sure you always know what's going on, sign up for our newsletter here!
©Kitronik Ltd – You may print this page & link to it, but must not copy the page or part thereof without Kitronik's prior written consent.


