Python is a language that allows you to organise your code into sections easily. At its most basic, this is the writing of a function, where code can be called from your main program multiple times. As your programs become bigger and more complex you might have a lot of related functions – They might be organised into a class, and it can make sense to think about placing that class, or set of functions into a separate file – this is known as a module.
A module is just a file that is separated from your main file, but the code in it is used as though it was all in one place. To make the code visible in a file the import statement is used. This tells the python interpreter that there is a file somewhere that has more code in it, and it should use that code as well please.
The python interpreter needs to be able to find the module - on the Pico that means it should be saved to the Pico, with the file name that is used in the import statement, and a .py extension.
If you miss the extension off the file name, or have forgotten to save the file to the Pico at all, your Thonny will show an error in the shell window like:

An example:
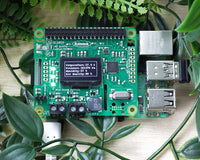
The Kitronik Pico Robotics board has a class which provides a simple way to access the functionality of the board. The following example code uses this class to pulse a motor attached to the board.
import PicoRobotics
import utime

board = PicoRobotics.KitronikPicoRobotics()

while True:
    board.motorOn(3,"f",100)
    utime.sleep_ms(50)
    board.motorOff(3)
    utime.sleep_ms(200)

The Pico Robotics class is in a file called PicoRobotics.py - it can be downloaded from the Kitronik Git Hub here.
To get the module onto the Pico open the file from ‘This computer’ in Thonny, (or copy and paste the contents into a new file):

Then save the file to the Pico:

Don’t forget to add the .py extension so that the Python interpreter knows it’s a python file.
Once the file and your code file are saved then run the code. You should get a motor attached to the motor 3 output pulsing.
If you enjoyed this guide, make sure you don't miss out on any other new free learning resources by signing up for our newsletter here
©Kitronik Ltd – You may print this page & link to it, but must not copy the page or part thereof without Kitronik's prior written consent.


