
This project demonstrates the versatility of our new Faux Leather, which is fully laserable and engraves like a dream! We’re going to be covering some simple leather-working tips to help you make the best project you can! This project is a Bi-fold Wallet, which is deceptively simple, and leaves you with a functional final outcome that you can feel proud of every time you use it!

We have used:
- Brown Laserable Faux Leather
- Optional: Magnetic Fasteners
- Laser Cutter
- Two Needles
- Waxed Thread
- Thin Card
- This DXF

How we made it:
Grab everything you need and follow along with Emma's step by step instructions and learn how to make your own.
Step 1 - Get the File
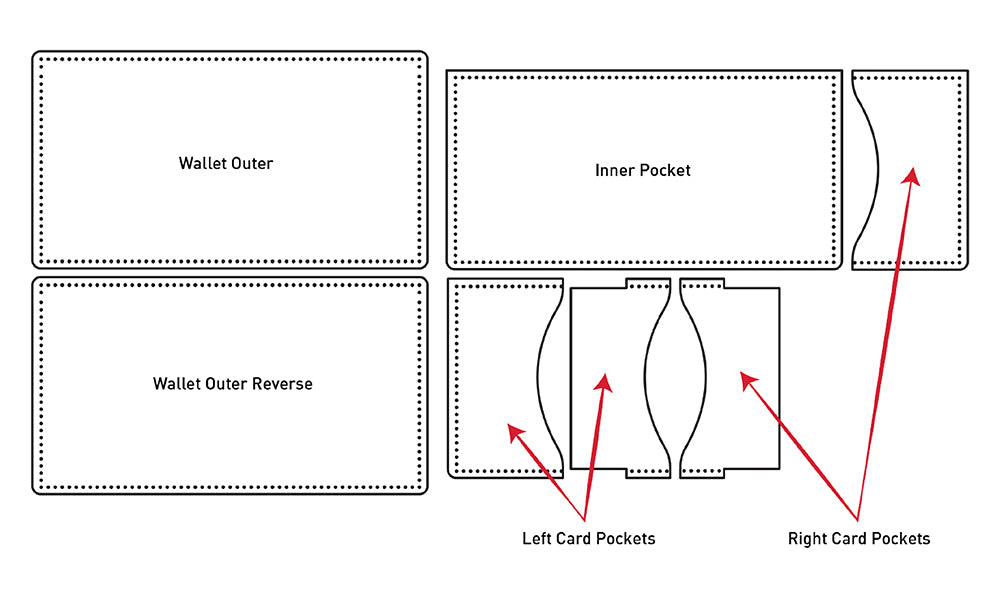
Check out the DXF file! The above diagram breaks down the parts as they’re laid out on the file.
Step 2 - Laser Cutting:
Laser cut the Leather. Don’t forget to cut the holes before the outline so the material doesn’t shift before the inside is cut. Also, engrave first before cutting if you are adding a design!
Step 3 - Structure:

Cut some card into two 77mm x 90mm pieces, and use some PVA or fabric glue to attach it on the inside of the wallet outer. This provides structure to the wallet.
NOTE: Once you have all your pieces, if you wanted to use any leather paint or decorate in any way (such as adding e-textiles!) now is the time to do it.
Step 4 - Line up parts:

Line the sections up as shown and secure with sewing clips, or pegs in a pinch (pun intended).
Step 5 - Sewing:
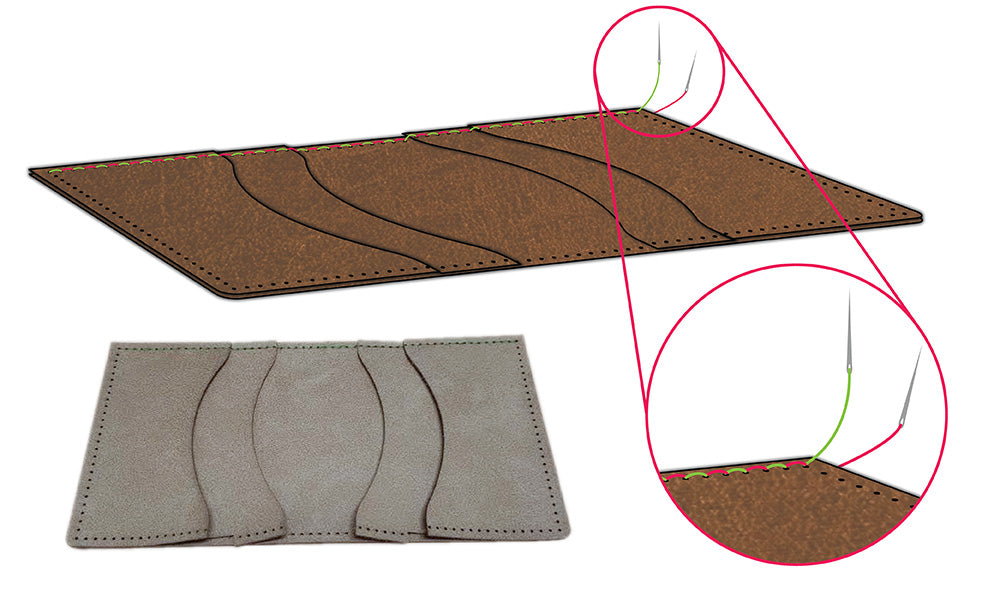
Now, you should use a saddle stitch along only the top of the layers - this is the edge with square corners that will become the top of the bank note pocket.
The saddle stitch is a leather-working stitch that strongly secures layers together, and will retain its strength even in the event that one stitch breaks on one side (https://tandyleather.com/blogs/tandy-blog/tandy-skills-saddle-stitching).

This is a basic diagram of a saddle stitch. It shows a single length of a strong waxed thread with a needle at both ends. The needles are passed through the same holes from opposite directions, and the profile of your stitching should look like the diagram. Below is a great explanatory video from Tandy Leather
Step 6 - The edges:

Finally, use the saddle stitch around the entire perimeter of the wallet, securing everything together!
Step 7 - Optional magnetic fastening:
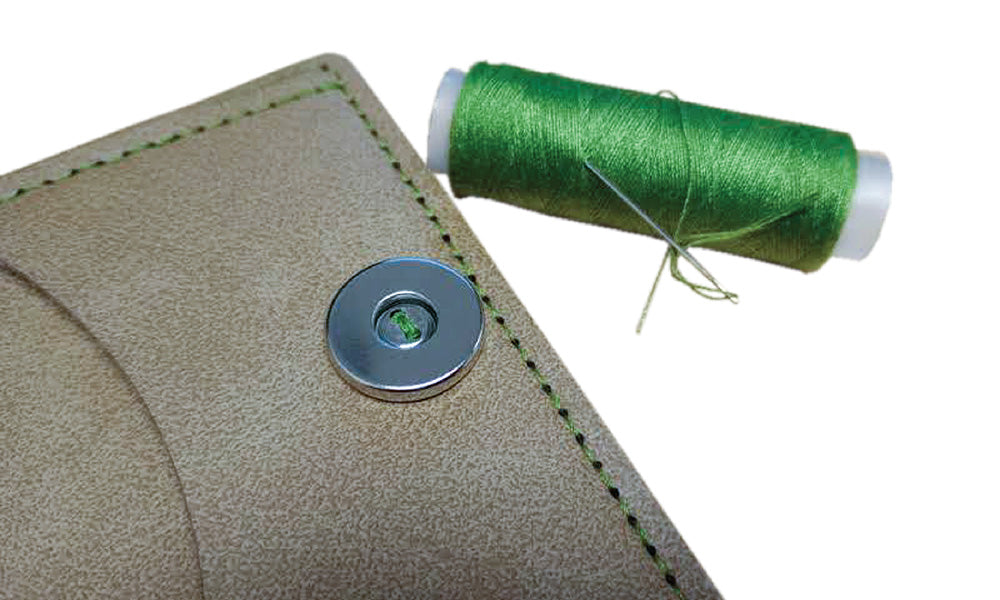
Optional: Add a magnetic button, which we sell here. These can be sewn onto the inside, on the front-most card pocket, to hold the wallet closed.
As said earlier you can engrave your wallet, and the example shown on our wallet is one I made for myself using vintage and witchy vectors from freepik!

©Kitronik Ltd – You may print this page & link to it, but must not copy the page or part thereof without Kitronik's prior written consent.


